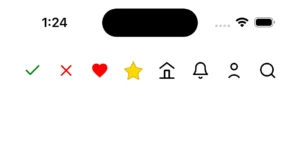
React Native doesn’t directly support rendering SVG. As developers, our lives can’t move forward without SVGs. So, we need to depend on libraries like react-native vector icons to render icons, but we’re restricted to using only the icons provided by those libraries. This blog will help you render your customised SVG icons in React Native.
Using react-native-svg:
Prerequisites:
- ➤ A basic React Native project setup
- ➤ Familiarity with React Native components.
- ➤ The
react-native-svglibrary is required for rendering SVG icons
Why do we need react-native-svg library? React Native doesn’t know how to process SVG elements. So, we need this library to help React Native understand and render SVG elements.
Svg elements like
<svg>, <path> or <circle> are parts of the web’s DOM and SVG specification. React Native doesn’t natively understand or support these elements.So, we need this library, which provides React components (like
<Svg>, <Path> etc.) that map to native drawing APIs on iOS, Android, macOS and Windows.Let’s get into it, Install react-native-svg: Open your terminal, navigate to your project’s root folder, and run the commands below.
Using npm:
npm install react-native-svg
Using yarn:
yarn add react-native-svg
Link native code: (For iOS only)
cd ios && pod install
import Svg, { Circle, Path } from 'react-native-svg';

const UserIcon = () => (
  <Svg
    width="24"
    height="24"
    viewBox="0 0 24 24"
    fill="none"
    stroke="black"
    strokeWidth="2"
    strokeLinecap="round"
    strokeLinejoin="round"
  >
    <Circle cx="12" cy="7" r="4" />
    <Path d="M5.5 21a8.38 8.38 0 0113 0" />
  </Svg>
);

export default UserIcon;
Note: Look at the SVG elements; they don’t look like the default SVG elements in the SVG file, right? Yes, you should use Pascal case for elements, just as we usually do for React components. You can pass SVG properties as props, like the above snippet (width, height, etc. are passed as props). Here is some more info about the usage. Import into your component: App.tsx
import UserIcon from './components/UserIcon';

function App() {
  return (
    <>
      <UserIcon />
    </>
  );
}

export default App;
Rebuild and run the app… Boom, now you can see the icon in your app.
Using react-native-svg-transformer
Prerequisites:
- ➤ A basic React Native project setup
- ➤ Familiarity with React Native components.
- ➤ The
react-native-svglibrary is required for rendering SVG icons - ➤ The
react-native-transformerlibrary is required if you want to import.svgfiles. - Why do we need react-native-svg-transformer? We have already seen the purpose of the react-native-svg library in the above section. React native doesn’t natively support importing SVG files. It will throw an error if we use it. This library helps React Native import SVG files.
react-native-svg-transformer acts as a custom Metro bundler transformer. It tells Metro how to handle .svg files – converting them into valid JSX components using react-native-svg under the hood.Let’s get into it, Install react-native-svg-transformer: Note: This libraryrequires react-native-svg; ensure you have installed itby following these steps. Open your terminal, navigate to your project’s root folder, and run the commands below.
Using npm:
npm install -save-dev react-native-svg-transformer
Using yarn:
yarn add --dev react-native-svg-transformer
This library is added as dev dependency because:
- It’s only needed during development/build time, not in the actual running app.
- It helps Metro (the React Native bundler) transform
.svgfiles into JS components. - It doesn’t get bundled into the final production JS budle – your actual app just uses the transformed result.
Configure bundler to use the transformer:
Modify your metro.config file as described below:
const { getDefaultConfig, mergeConfig } = require('@react-native/metro-config');

const defaultConfig = getDefaultConfig(__dirname);
const { assetExts, sourceExts } = defaultConfig.resolver;

/**
 * Metro configuration
 * https://reactnative.dev/docs/metro
 *
 * @type {import('@react-native/metro-config').MetroConfig}
 */
const config = {
  transformer: {
    babelTransformerPath: require.resolve(
      'react-native-svg-transformer/react-native',
    ),
  },
  resolver: {
    assetExts: assetExts.filter(ext => ext !== 'svg'),
    sourceExts: [ ...sourceExts, 'svg' ],
  },
};

module.exports = mergeConfig(defaultConfig, config);
For TypeScript,
Add the following in the declarations.d.ts file (Create this file if it doesn’t exist).
declare module '*.svg' {
  import React from 'react';
  import { SvgProps } from 'react-native-svg';
  const content: React.FC<SvgProps>;
  export default content;
}
Configure SVGR: (Optional) This is an optional step; you can customise how the SVG image gets transformed to React/React native. Read more about the configuration: Configuring SVGR and SVGR options If you want to configure, you have to add .svgrrc file in your project root folder and add configurations based on your need.
Add SVG file in your project under assets folder:
user.svg
<svg xmlns="http://www.w3.org/2000/svg" viewBox="0 0 24 24" fill="none"
     stroke="black" stroke-width="2" stroke-linecap="round" stroke-linejoin="round">
  <circle cx="12" cy="7" r="4" />
  <path d="M5.5 21a8.38 8.38 0 0113 0" />
</svg>
Import into the component:
app.tsx
import User from './assets/user.svg';

function App() {
  return (
    <>
      <User />
    </>
  );
}

export default App;
As you can see, the import now works directly for SVG files into the components. Now rebuild and run, and you can see the icons. Conclusion: Choosing the right library depends on your project’s requirements. If your app uses only a few simple icons, then using just the first library is more than enough — it keeps your setup lightweight and clean. However, suppose your project involves a large number of SVG icons or you plan to share SVG assets across platforms like React or Angular web apps. In that case, it’s highly recommended to include a second library as well. It offers better scalability and asset reusability across projects.
In short, go minimal if your needs are simple – go scalable if you’re thinking long-term and cross-platform.
References:
- react-native-svg – A library to render SVG elements in React Native.
- react-native-svg-transformer – Allows importing .svg files as components in React Native projects.
Find the demo project on my GitHub.